You may occasionally want to do some housekeeping on your QNAP NAS, and deleting folders may be a big part of it. Here’s how to delete a folder from File Station 5 on your QNAP NAS.
Deleting Shared Folders
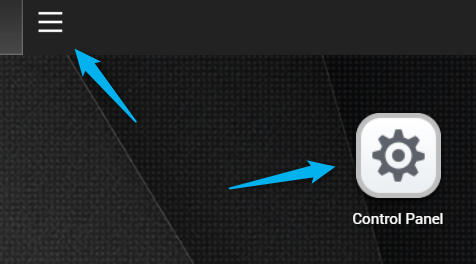
To delete a shared folder, log in to QTS and open Control Panel. You can do this by clicking the “Control Panel” app on your home screen or by clicking the hamburger menu in the top-left corner of the screen and then selecting Control Panel from the menu.
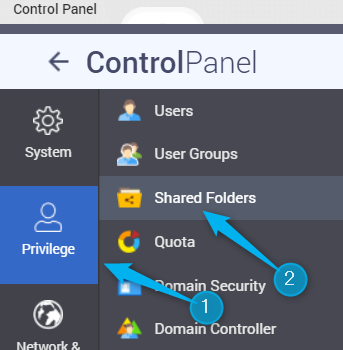
Next, click “Privilege” and then select “Shared Folders.”
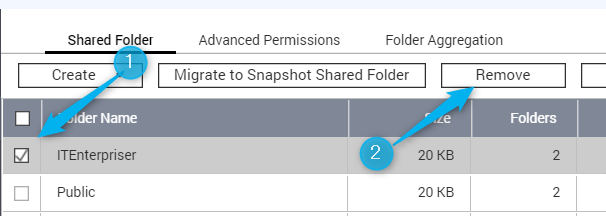
A list of your folders will appear. Click the box next to the folder you want to delete to select it. Once selected, click “Remove.”
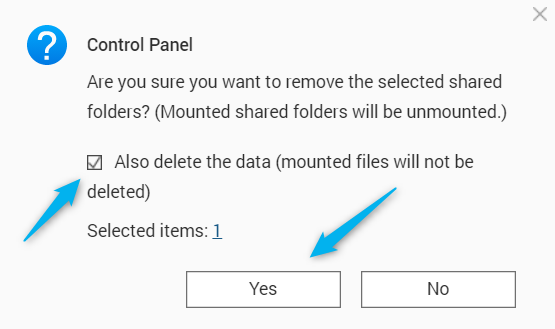
A message will appear asking if you’re sure you want to delete the shared folder. It also gives you the option of deleting the data within the folder. Check the box if you want to do that, and then click “Yes.”
The shared folder is now deleted.
Deleting Default Folders
When you configure your first volume on the NAS, it will create three folders by default–Public, Web, and homes. The Public and Web folders can’t be deleted, as they are necessary folders for QTS. However, you can delete the “homes” folder, but you’ll need to disable an option first.
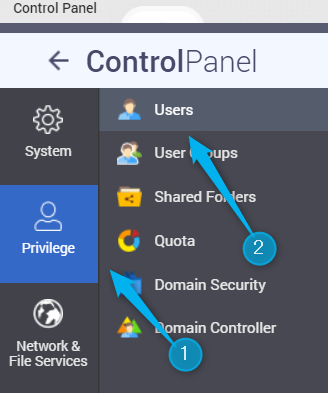
In the Control Panel, click “Privilege” and then select “Users.”
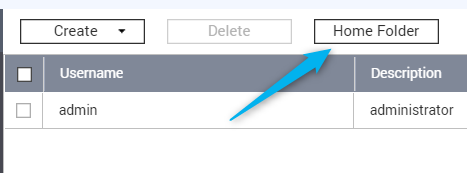
At the top of the window, click the “Home Folder” button, found next to the Create and Delete options.
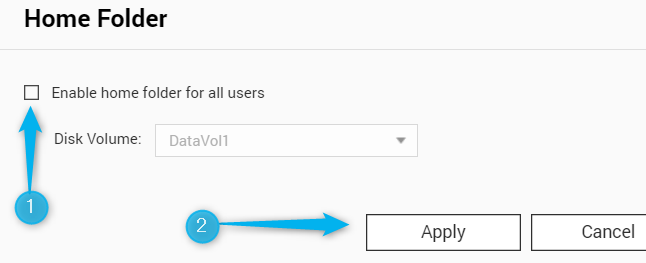
The Home Folder pop-up window will appear. Deselect the “Enable home folder for all users” option and then click “Apply.”
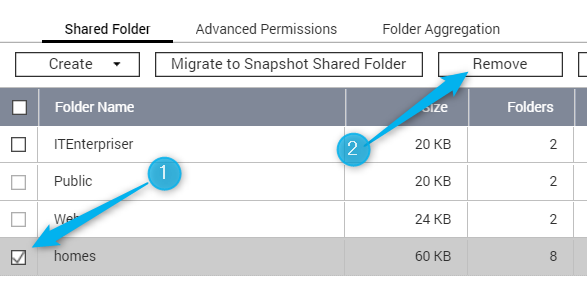
Next, go to “Shared Folders.” You’ll see a list of your folders. You can now check the box next to the “homes” folder. Do so, and then click “Remove” at the top of the window.
The message asking if you’re sure you want to delete the folder and accompanying data will appear. Click “Yes.” The “homes” folder will now be deleted.


