If your QNAP NAS box was infected with malware (such as QSnatch), or you simply plan to sell it, you’ll need to perform a factory reset to wipe your info and restore its default settings. Here’s how.
Restore Your QNAP NAS to Factory Default
Restoring a QNAP NAS to its factory default means you will completely reset the NAS and wipe all of the data that’s stored on the hard drives. If you lost your password, you can perform a system reset without deleting your data.
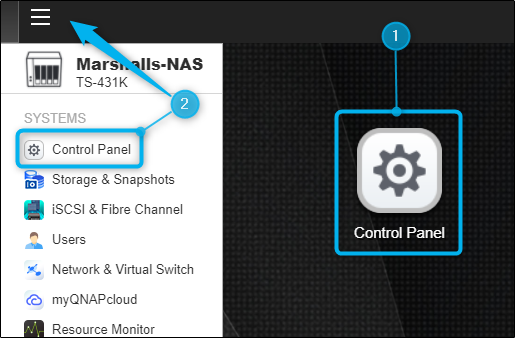
To factory reset your QNAP NAS, log in to the NAS and open the “Control Panel” app. The app should be on your home screen but if it’s not, you can click the hamburger icon in the top-left corner of the window and select “Control Panel” under the “Systems” group.
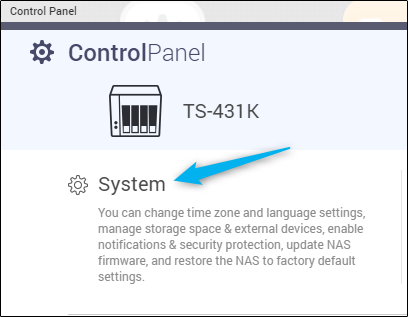
The “Control Panel” window will appear. Here, select “System.”
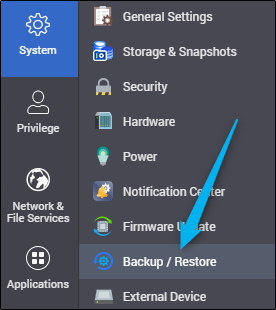
In the next screen, you’ll see a list of different system settings topics in the “System” sub-pane. Click “Backup / Restore.”
Next, select the “Restore to Factory Default” tab.
On the next page, you’ll have three options to choose from:
- Restore Factory Defaults & Format All Volumes – Restores default system settings and formats disk volumes. When using this option, your volumes and RAID group will remain, though the volumes will be empty.
- Reset Settings – Restores the default system settings without erasing user data.
- Reinitialize NAS – Completely erases all user data and reinitializes the NAS. This option restores the NAS as if you just pulled it out of the box.
While the first and third option will both accomplish the same goal, if you have any issues at all with the NAS, select “Reinitialize NAS.”
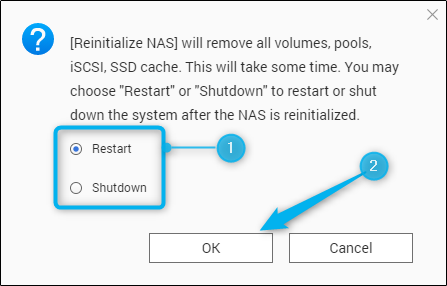
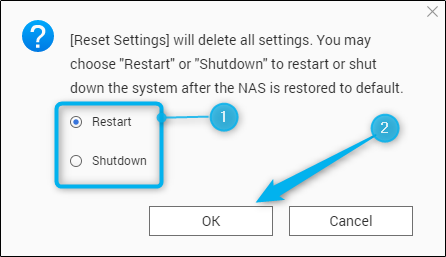
A pop-up window will appear, alerting you that this option will remove all volumes, pools, iSCSI, and SSD cache. Choose if you’d like to restart or shutdown the NAS after reinitialization, and then click “OK.”
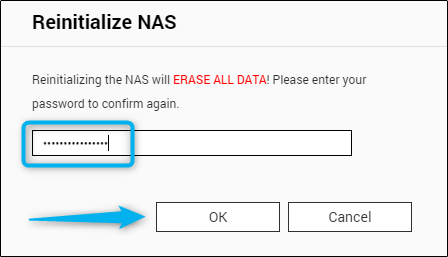
Finally, enter your password and click “OK” to confirm you really want to factory reset the QNAP NAS.
This will take a bit of time to complete.
Reset QNAP NAS System Settings
It’s also possible to reset the system settings without losing user data. You can do this by performing a software or hardware reset. If you lost your password, you’ll need to perform a hardware reset.
Software Reset System Settings
To reset your system settings using the software reset feature, navigate to the system settings’ “Backup / Restore” tab (Control Panel > System > Backup / Restore), and then select the “Restore to Factory Default” tab.
Here, select “Reset Settings.” As mentioned in the UI description, this option restores system settings to default but retains user data.
A pop-up window will appear, stating this will delete all system settings. Choose if you’d like to reboot or shutdown the NAS after the process is complete, and then select “OK.”
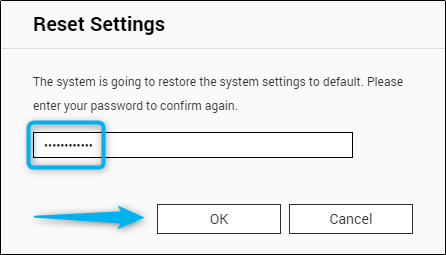
Finally, enter your password for final confirmation that you’d like to proceed.
After a while, your system settings will be reset to default.
Hardware Reset System Settings
If you forgot your password, hardware reset your system settings to gain access to your NAS. No user data will be lost in either hardware reset type.
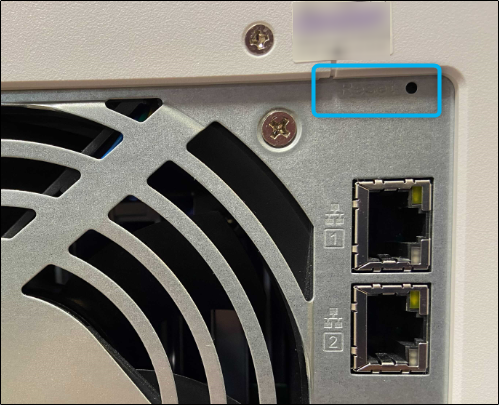
There are two types of hardware resets you can perform–soft or hard resets. Regardless of the type you choose, you will need to locate the reset button on the back of your NAS, and use a small pin to press and hold the button for a certain amount of time.
Here’s how to perform each reset type, and what they do.
Soft Reset (3 Seconds)
To perform a soft reset, press and hold the reset button on the back of the NAS for 3 seconds. Let go of the button once you hear a beep.
As stated on the manufacturers online documentation, these are the settings that will be reset to default with a soft reset:
- Login credentials (username and password)
- TCP/IP configuration
- Obtain IP address settings automatically via DHCP
- Disable Jumbo Frame
- For dual LAN models, if port trunking is enabled, port trunking mode will be reset to “Active Backup (Failover)”
- System Port: 8080
- Security level: Low
- VLAN will be disabled
- Service binding
Hard Reset (10 Seconds)
Performing a hard reset has the same effect as using the software reset feature. That is, it completely resets the system settings to default. Data on the drives will remain intact, however, you’ll need to create the same network shares on the NAS in order to retrieve the old data.
To perform a hard reset, press and hold the reset button on the back of the NAS for 10 seconds.
Disable the Hardware Reset Button
If your NAS is in an open area (not recommended), then you may want to disable the reset button on the back of the NAS to prevent someone from being able to reset your NAS. Note that this is not recommended, and if you disable the hardware reset button, you will not be able to reset your admin password or system settings using the hardware reset method. Ideally, keep your NAS in a location that is only accessible by authorized users.
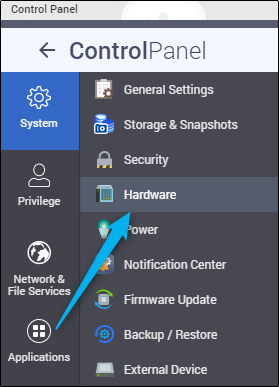
If you’d like to disable the hardware reset button on the NAS, open the “Control Panel” app, click “System,” and then click “Hardware” in the sub-pane.
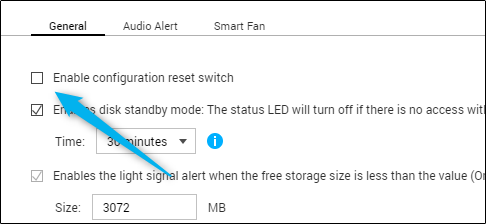
In the “General” tab, uncheck the box next to “Enable Configuration Reset Switch.”
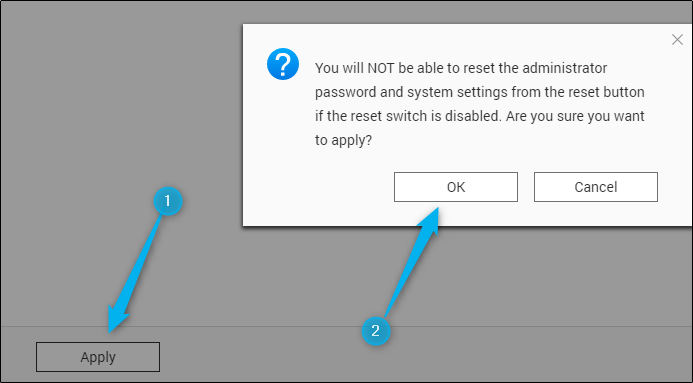
Next, click the “Apply” button at the bottom of the window. A pop-up message will appear, warning you that you won’t be able to reset the password and system settings if you disable the reset button. Click “OK.”
Once applied, the reset button will be disabled.
Default Login Credentials
If you reset your NAS, you’ll need to use the default login credentials to access the NAS. The login credentials are different based on the QTS version you use.
- QTS 4.4.1 and earlier
- username: admin
- password: admin
- QTS 4.4.2 and later
-
- username: admin
- password: MAC address (all caps, exclude special characters)


