When you purchase a new QNAP NAS, the first step is connecting it to, and finding it on, the local network. Once found, you can then begin setting it up. Here’s how to find your QNAP NAS.
How to Find Your QNAP NAS with Qfinder Pro
QNAP makes finding your NAS extremely simple with Qfinder Pro, a utility that locates each QNAP NAS that’s connected to your local network. This isn’t the only means of locating and accessing your QNAP NAS–you can find the NAS’s IP address and enter it in the address bar–but it is the quickest and easiest. Especially for first time setup, since you won’t have the IP address readily available.
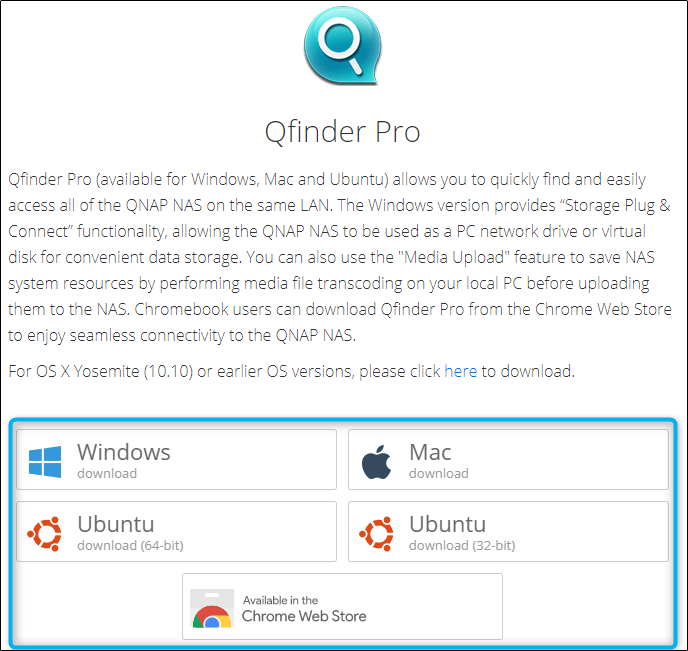
Go to QNAP’s official website and download Qfinder Pro, which is available for Windows, Mac, and Ubuntu.
After the software is downloaded, the Wizard will guide you through the installation process. At the end of the installation, the wizard will prompt you to open Qfinder Pro. If you want to come back to it later, you can access Qfinder Pro from the created desktop icon.
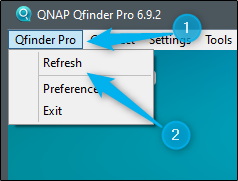
Once opened, your NAS should appear in the device list. If it doesn’t, select “Qfinder Pro” in the top-left corner of the window, and then select “Refresh” from the drop-down menu.
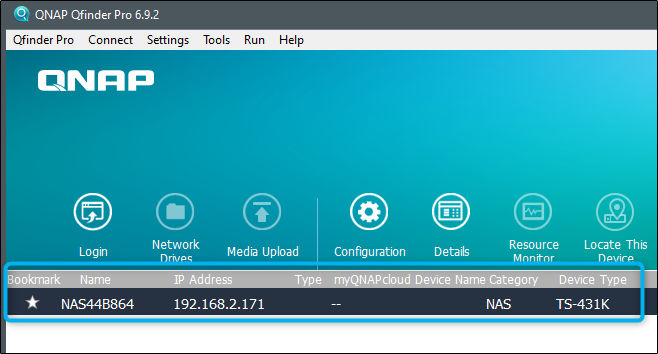
Your QNAP NAS should appear in the list. Some of the details include the name, model, IP address, MAC address, and more.
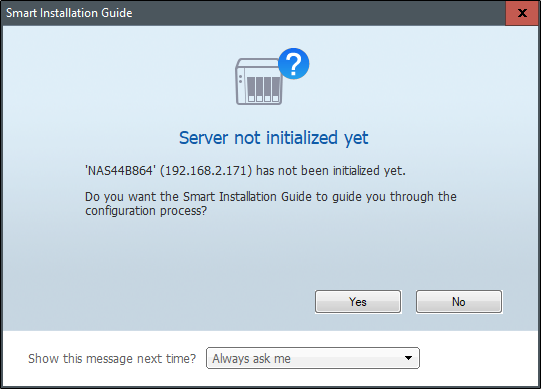
Double-click the NAS you would like to access. As a side note, if there’s a NAS on the list that hasn’t been initiated yet, Qfinder Pro will automatically detect this and prompt you to configure it.
How to Find Your QNAP NAS IP Address without Qfinder Pro
If you already know the IP address of your NAS, you can simply type it into the address bar of your browser. However, if it’s your first time using the NAS, you’re not going to know its IP address. We strongly recommend using Qfinder Pro, as QNAP created this application to save you this cumbersome process, but if you want to feel like a hacker, you can use Command Prompt on Windows 10.
Using Command Prompt, you can locate all of the device’s on your local network, along with their IP address and MAC address. There’s also a way to verify which address belongs to your QNAP NAS.
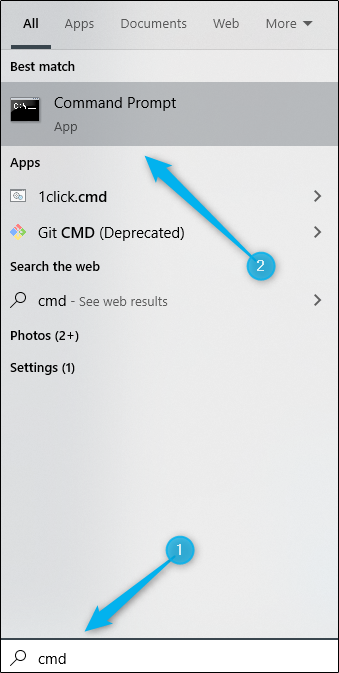
Open Command Prompt in Windows 10 by typing “cmd” in the Windows 10 search bar, and then selecting the “Command Prompt” app from the search results.
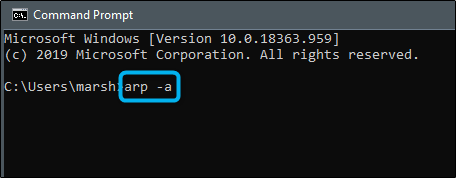
In Command Prompt, run this command:
arp -a
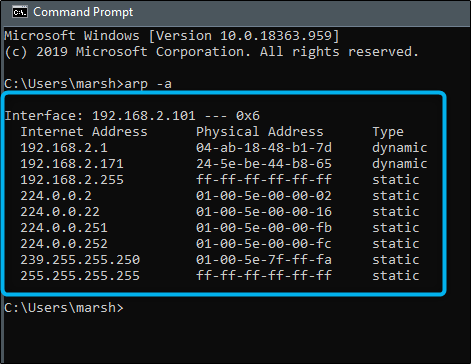
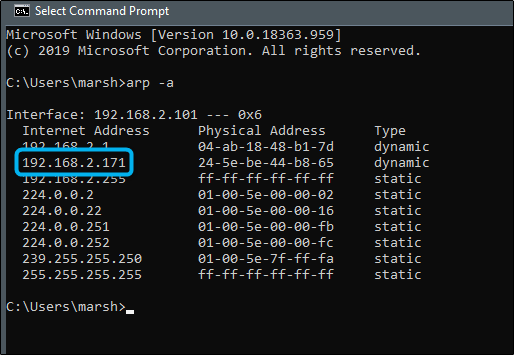
Once the command has been executed, you should see the information of all the devices connected to your local network.
As you can see, it returns the Internet Address (IP Address), Physical Address (MAC address), and Type of each device on the network. This returned list may overwhelm you, but we can safely ignore some of these. Let’s dissect this.
At the very top, next to “Interface,” you’ll see an IP address. This is your network adapter’s IP address. Since we know this isn’t what we’re looking for, we can ignore it.
In the actual list, we see a few IP addresses that look like 192.168.x.x. These are what you want to look at, as the represent physical devices connected to the network. All of the other’s, such as 224.0.0.2 and after, represent not physical devices, but IPs used for multicasting. So they can also safely be ignored.
So in our example, we’ve narrowed it down to three potentials. If you want to find out which one is your QNAP NAS, take the Physical Address (MAC address), and plug the value in the MAC address lookup from DNS checker.
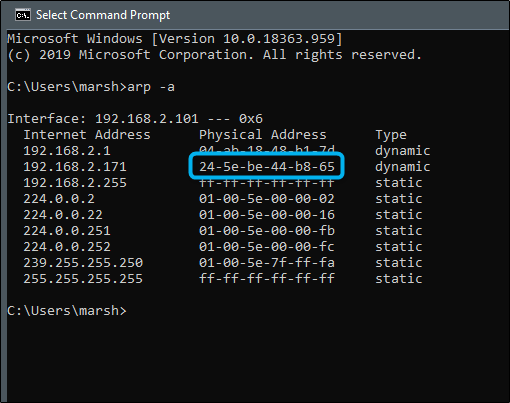
For example, we’ll check this MAC address from our list:
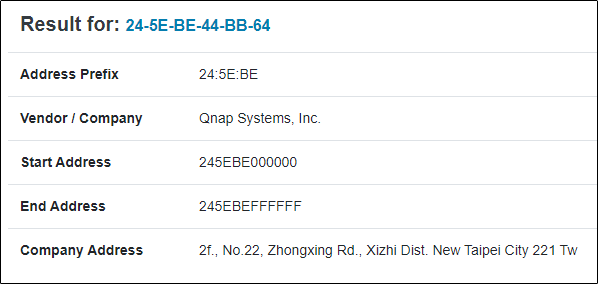
In DNS Checker’s MAC address lookup tool, we’ll input the selected MAC address and click “Search.”
The results will be returned in a few moments.
So now that we’ve verified that the MAC address 24-5E-BE-44-BB-64 belongs to our QNAP NAS, we can go back to Command Prompt and grab the correct IP address.
You can now enter that IP address in the address bar of your browser to access the QNAP NAS.
In the example we provide, we only have three IP addresses that we need to look at. However, in most cases, you’ll see many, many more. And if you have multiple QNAP NAS on your network, you may have a hard time finding which IP address belongs to the specific model you’re looking for.
So, use Qfinder Pro.


